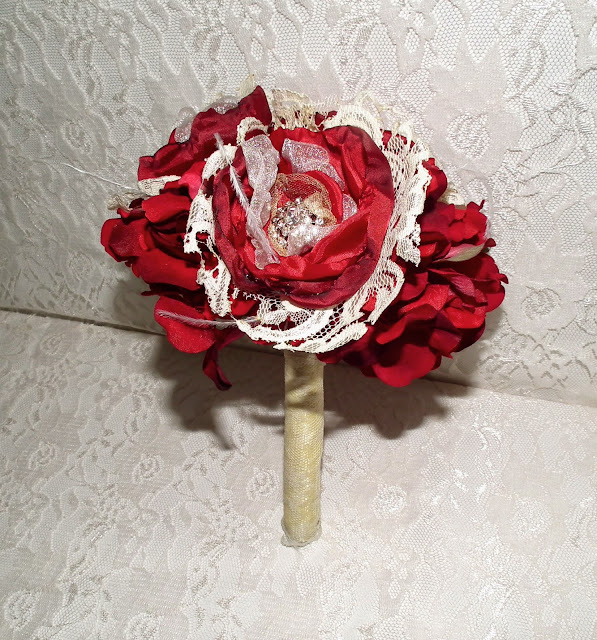
My niece is having six bridesmaids - that's a lot when you're DIY'ing. This project took me awhile to complete. Of course, I wanted something that would match her bouquet. Since I had a lot of vintage rhinestone buttons in my stash, I decided I would make flowers for the bouquet and use the buttons as the center of the flowers. I started with circles of fabric - lace, tulle, satin and chiffon - in colors of red and yellow. And I used the burn technique to melt the edges and center of the fabric to create interesting shapes (this is the same technique I used for the corsages I made earlier). Again, there a lot of blogs which cover how to do this, so I won't cover it here. Just be very careful you don't burn yourself and use fabric that will melt, not burn. I had to be careful with the lace, because only a part of it would melt.
My next step was to take a floral stem wire and insert it through all layers of the fabric. Because the fabric is thin, this wasn't hard to do even though the point of the wire isn't as sharp as a pin. I threaded the button on the wire and then inserted the other end of the wire back through the fabric.
To give the flower some stability, I threaded another button through the ends of the wire on the backside and then twisted the wire together.
For each bridesmaid bouquet, I wanted a total of three flowers.
My next step was to use some of the feathers that I had used in the bridal bouquet to wrap around the stems of the flowers. I cut a piece of white tape and put the feather trim on it. I had a long enough piece of tape that I would be able to wrap it completely around the stems several times.
If you're using feather trim like I have, make sure you have the feathers in the right position on the stem. I made the mistake on one of wrapping the feathers towards the stems instead of towards the flowers and had to remove the tape which was a major headache. The feathers like to stick to the tape and are hard to work with anyway.
The next step was to add a couple of hydrangea stems to the bouquet. These are the same hydrangeas that I used in the bridal bouquet. I wrapped floral tape around all the stems - the three flowers and the hydrangea stems.
After looking and looking for something to use as the handle of the bouquet to give the bouquet some stability, I found a black plastic Riser Flex Pipe at Home Depot that I thought would work. It's hollow in the middle. It measures 1/2" by 24". I cut it in 6" segments to use as the handles for the bouquets. When I inserted the stem of the bouquet into the pipe, it fit perfectly and was a tight enough fit, that the handle would not come off without being pulled.
Next, I wrapped the black pipe stem in yellow ribbon and glued it in place with hot glue.
It didn't look perfect at that point but that was ok, because I took a piece of lace and wrapped that around the handle over the yellow ribbon. I also used hot glue to glue it in place. The lace gave the bouquet a vintage look and covered the imperfections in the ribbon.
Once I had the handle finished, I put it onto the stem of the bouquet. This is a picture from the wedding with all of the bouquets I made!


No comments:
Post a Comment