I have been making melt and pour soap for family and friends for several years. I buy trays of soap, melt them down, and add extra oil and other ingredients. I use soap molds or silicone cupcake molds, depending on the shapes I want.
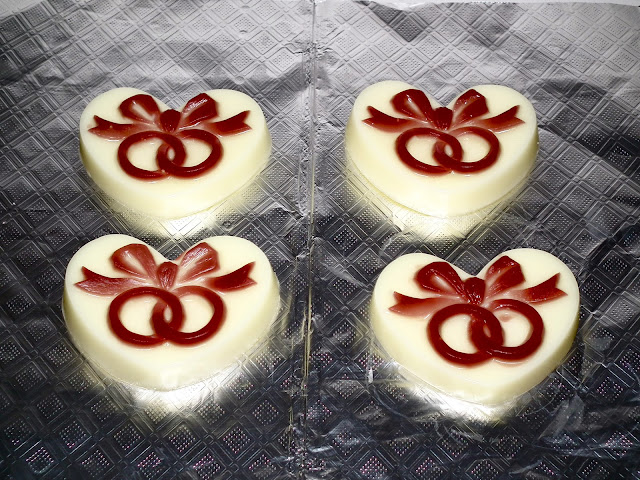
So, I saw a heart mold with a double ring and bow which I thought would be perfect for wedding favors. Because the rings and bow are indented, I can use one color for that and then another color for the base of the soap. I decided that the rings would be red and the soap base would be yellow. I didn't want to add anything extra to the soap besides color and fragrance because I didn't want to take a chance that the red would bleed. Reds are known for bleeding and in fact, the first batch I made did exactly that. The fragrance I am using is lemon ice.
I buy my soap base from Wholesales Supplies Plus. I like the goat milk base. After my first red bled, I also purchased a Burgundy Red Soap Color Bar from Wholesale Supplies which isn't supposed to bleed. My other supplies include my soap molds - I purchased 10 molds from an Etsy seller - and my yellow color and lemon ice fragrance.
Even though I don't have it pictured, I used a clear glycerin soap for the red rings and bow. I wanted the color to stay true and not turn pink as it might have in the goat milk soap.
My first step was to melt the glycerin soap for the red color. I always use a double boiler to melt the soap. Once the soap was melted, I added a little of the red color to it and stirred until it was melted and mixed in. I had turned my burner on low at this point. I kept adding a little color at a time until I had it dark enough. Then I turned the burner off but left the pan on the hot water. I didn't want my soap to harden before I had it in all the molds. I had tried pouring the soap into the molds but that just didn't work. I wasn't able to get it into the indented part without pouring it all over the bottom of the mold. So, I decided to use a glass medicine dropper. That worked very well. I worked quickly enough that the soap didn't harden on the stopper enough to keep it from working. There were some bubbles that formed in the rings and bow by using the dropper but I was able to pop most of them.
While the red soap was hardening, I started melting the goat milk soap for the base - again, in the double boiler.
Once it was melted, I took it off the heat and added the yellow color and fragrance to it.
I mixed this up so the fragrance and color would be uniformly distributed. Then, I let this sit to cool off. The reason that I left the red soap on the boiler is because there was very little of it and it would have hardened quickly. I don't need to do that for the yellow soap because there is a lot more of it and also I will pour it into the molds so that goes very fast.
I need to let the soap cool enough that it won't melt the red soap which is already in the mold when I pour the yellow soap on top of it. There's a fine line between cool enough and too hot. You just have to experiment.
Once I reach that temperature, I spray the molds with the red soap with alcohol. This will cause the two layers to adhere to each other. Believe me when I say you absolutely need to do this - ask me how I know. :)
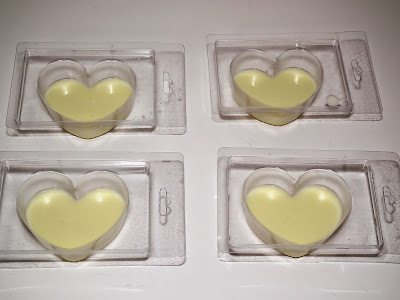
I then pour the yellow soap into the molds about half way. Since these are favors, I see no need to have a huge bar of soap. Then, I let them sit until they've hardened.
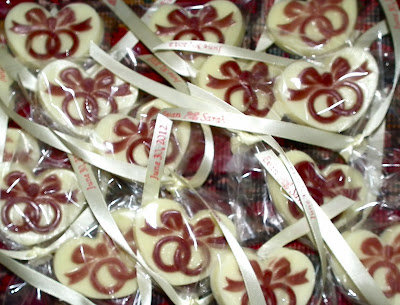
I then push them out of the molds onto a piece of tinfoil. I put each piece of soap into a treat bag. I purchased a personalized ribbon with the names of the bride and groom and the wedding date and tie those around the bag.


Thank you so much for sharing your idea. I've never even considered doing anything like this. I Love It. I have a future daughter in-law, the wedding is in June. I'm going to show your blog to her. Thank you again for introducing me to something I've never even thought about doing. Janey
ReplyDeleteHi Janey,
ReplyDeleteIt's pretty easy once you get the hang of it. I had to experiment with a batch before I got it just right. I'd be happy to answer any questions you or your future daughter-in-law might have.