Showing posts with label diy bridal bouquet. Show all posts

Saturday, January 21, 2012

DIY Vintage Brooch Bouquet – Tutorial Part 2

Now that I've wired all my jewelry pieces, I need to put them together somehow. There are a couple of issues to think about at this point. For one thing, you want to be sure that the different colors are evenly distributed throughout the bouquet. The other issue is that you dealing with a lot of pieces of jewelry and you want to be sure they will all be showing when the bouquet is finished.

Having constructed the bouquet before, I learned that I needed to work in small batches instead of trying to gather up all the pieces and hope to have a decent looking bouquet when I finished. So, I began by grouping my jewelry pieces by color. I had groups of red, yellow, clear and white. I decided I would make five bunches, so I divided the number of each color group by 5. That told me how many pieces of each color I would add to each bunch.

As I was working with a bunch, I added one piece from each color group in rotation. That way I knew I wouldn't end up with two of the same color beside each other. I had approximately 14 pieces in a bunch, and this was definitely a manageable group.

Once I had the pieces together, I needed to wrap tape around them all to hold them as I had positioned them. This time instead of using that very sticky floral tape, I decided to use masking tape. I would tear a long strip off the tape beforehand, and then it was easy to wrap the strip around the jewelry stems.

I was pretty happy at how well things went this time with my grouping and wrapping. When I finished, I had five jewelry bundles.


Then I started putting the bundles together. This wasn't particularly hard to do. I wrapped all of the bundles with more masking tape. Because the masking tape wasn't wrapped tightly around the single bundles or big bundle, I found it easy to reposition any of the jewelry pieces that were too high or too low. I pulled and prodded the pieces until I had a bouquet that I liked.


Link to Tutorial Part 1

Link to Tutorial Part 3

Link to Tutorial Part 4
Read more ...

Monday, January 16, 2012

DIY Vintage Brooch Bouquet - Tutorial Part 1

I've deconstructed the brooch bouquet I'm working on for my niece, so I'm going to provide instructions as I go along. It was so helpful to me when I started thinking about doing this to search out tutorials from others. Because I have learned from my mistakes - things that weren't covered in the tutorials I found - I want to share what I've learned with others.

STEP ONE

Of course, the first step in any wedding planning - and I assume you've already done this - is to choose your colors. My niece's colors are red and yellow, so I knew that I needed to find some vintage jewelry with those colors. Jewelry with colored stones tend to be more pricey, so don't think that all your jewelry pieces need to have those colors. Use gold, silver, pearl, rhinestones, etc. as filler pieces. If you want to use only gold or only silver, you're going to have a hard time finding enough pieces at a reasonable price. Just as an aside, I'm talking strictly about vintage jewelry pieces, not the mass produced jewelry you can find at discount stores. Personally, I don't mind using both silver and gold pieces. I think it all blends when you're finished anyway.

Where do you locate vintage jewelry? Flea markets are a great place to look. You can also visit antique stores but they tend to be expensive. I bought a lot of jewelry on Ebay. I also bought jewelry on Etsy. In searching Ebay and Etsy for jewelry, use the terms "lot", "destash" and "collection" in the search box. Also, be sure to include whatever color it is you're using in your wedding. This will narrow down the list of results. There's no sense in buying a lot of jewelry you won't need or use, even at a good price. I only wanted vintage jewelry and if that's true of you, you need to be careful on both Ebay and Etsy. There's jewelry for sale that is definitely not vintage and sometimes it's hard to tell the difference.

I am using both vintage earrings and brooches or pins (alternate term to include when searching). The brooches tend to be bigger in size and are more expensive. The earrings are smaller but really good filler pieces. And they don't weigh nearly as much as most brooches do.

How many jewelry pieces do you need for your bouquet? I would recommend that you have a least sixty. You could have a little more or a little less, depending on how big the pieces are. If you're using a lot of earrings, you may need more.

STEP TWO

OK - now that you've got your jewelry that you're going to use, it's time to start putting stems on the pieces. For the most part, I found that 22 gauge floral stem wire was sufficient for my pieces. However, I had a couple of really heavy brooches and I used a cloth wrapped floral wire for those.

Something I didn't do in the beginning that I wish I had is to glue the earrings shut and to glue the pin closure on the brooches. It would have made the pieces easier to work with and is just a good idea anyway for safety reasons and to ensure the pieces won't flop around as the bride walks down the aisle. Since deconstructing the bouquet I'm making, I've gone back and added glue to brooches and some earrings that were loose.

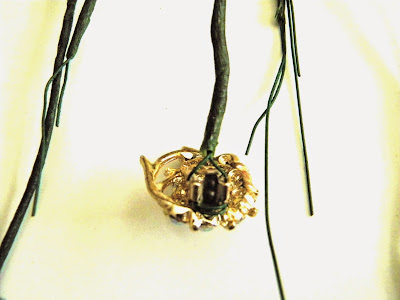
This was the hard part for me. There was definitely a learning curve of how to wrap the stem on the pieces so that they are sturdy. For most of the brooches, I wrapped the wire around both ends. For some of the heavier brooches, I actually used two wires and wrapped one around each end. For earrings, I could use one wire but I had to figure out how to wrap it just right so the earring wouldn't wiggle. Sometimes that meant I needed to wrap it around the earring back several times. You are wrapping the jewelry from the middle of the wire, because you are going to join the two sides of the wire and twist them together as the jewelry stem.

Here are some examples of how I wrapped the wire around the jewelry pieces:


Once you've finished wrapping the wire around the jewelry piece and have twisted the two sides of the wire together, you need to wrap the twisted wire stem with floral tape. This is the part I really, really hated. I would actually recommend waiting until you finish wiring all the jewelry pieces before you begin the process. The reason for that is the floral tape makes your hands very sticky, and it's hard to go back and work on the jewelry pieces without getting everything sticky in the process.

If you've never worked with floral tape, there is a learning curve to using it too. It has to be pulled slightly as you're wrapping it around the stem or it won't stick properly. But you don't want to pull it too much either. You might want to work close to a sink and soap so you can wash your hands before you touch anything else, because the stickiness comes off on everything. My scissors are still sticky months later.

So, that completes the first part of this tutorial. I'm including a picture of all my finished jewelry pieces.

As a final note, I know there are some tutorials out there where you attach the jewelry to a styrofoam piece instead of wiring each piece. The reason I wanted to wire the pieces is because I cannot stand to take a vintage item and ruin its value by taking parts off the back to be able to glue it to styrofoam. Making a bridal bouquet this way allows me to keep the integrity of the pieces intact. Even though I have glued some of them, I believe the glue can be removed.

Link to Tutorial Part 2

Link to Tutorial Part 3

Link to Tutorial Part 4
Read more ...